(440) 307-2060
The Ultimate Guide to Rubber Roofing Material: Benefits, Installation, and Maintenance
When it comes to roofing materials, homeowners and commercial property owners alike want something that is durable, cost-effective, and environmentally friendly. Rubber roofing material has gained significant popularity over the years as a reliable option for flat and low-slope roofs. But what exactly is rubber roofing? What are its benefits? How is it installed and maintained? This ultimate guide will cover everything you need to know about rubber roofing materials.
What Is Rubber Roofing Material?
Rubber roofing material, also known as EPDM roofing (Ethylene Propylene Diene Monomer), is a synthetic rubber membrane widely used in roofing applications. It is especially common in flat or low-slope roofs where traditional shingles may not be effective. EPDM roofing is known for its flexibility, durability, and waterproof properties.
Types of Rubber Roofing
- EPDM Roofing Membranes: The most popular type, typically comes in black or white sheets.
- TPO (Thermoplastic Polyolefin): Sometimes confused with rubber roofing, TPO is a single-ply roofing membrane made from a blend of polypropylene and ethylene-propylene rubber.
- Neoprene Roofing: Another type of synthetic rubber that offers excellent resistance to weathering and chemicals but is less common than EPDM.
Why Choose Rubber Roofing Material?
Choosing the right roofing material is crucial for protecting your property and ensuring long-term value. Rubber roofing offers several advantages:
1. Durability and Longevity
One of the top reasons to choose rubber roofing material is its impressive durability. EPDM roofs can last 30 to 50 years when properly installed and maintained. Unlike traditional asphalt shingles that may degrade faster due to UV rays and weather exposure, EPDM has excellent resistance to sunlight, ozone, and extreme temperatures.
2. Waterproof and Weather-Resistant
Rubber roofing material is inherently waterproof, making it perfect for flat roofs where water pooling is common. Its seamless nature prevents leaks, a significant advantage over other roofing types that may have overlapping shingles vulnerable to water infiltration.
3. Energy Efficiency
White EPDM roofing membranes reflect sunlight, helping to reduce heat absorption and lower cooling costs. This makes rubber roofing an energy-efficient choice for commercial and residential buildings, especially in warmer climates.
4. Flexibility and Ease of Installation
Rubber roofing material is highly flexible, allowing it to expand and contract with temperature changes without cracking or splitting. Its flexibility also means it can be installed on irregularly shaped roofs or those with complex features.
Installation is straightforward and quicker compared to traditional roofing methods, often requiring fewer seams and less labor, which can save on costs.
5. Environmentally Friendly
EPDM rubber roofing is often made from recycled materials and can be recycled again at the end of its life cycle. Its long lifespan reduces waste compared to other roofing materials that need frequent replacement. Additionally, white EPDM membranes help reduce the urban heat island effect by reflecting solar heat.
6. Cost-Effective
Compared to metal roofing or high-end shingles, rubber roofing materials are typically more affordable both in terms of material costs and installation. Considering its longevity, it offers a great return on investment.
Rubber Roofing Material Applications
Rubber roofing is versatile and can be used in various applications:
- Residential Flat Roofs: Ideal for homes with flat or low-pitched roofs.
- Commercial Buildings: Frequently used for warehouses, retail stores, and office buildings.
- Garages and Sheds: An economical and effective option for smaller structures.
- Green Roofs: Rubber roofing can serve as a waterproof membrane beneath vegetation layers in green roofing systems.
- RV and Mobile Homes: EPDM rubber roofing is lightweight and durable for vehicles.
How Is Rubber Roofing Installed?
Proper installation is key to getting the most out of rubber roofing material. Here’s an overview of the installation process:
Step 1: Roof Inspection and Preparation
Before installing the rubber membrane, the roof deck must be inspected and repaired as needed. The surface should be clean, dry, and smooth to ensure proper adhesion.
Step 2: Measuring and Cutting the Membrane
The EPDM sheets are measured and cut to fit the roof dimensions, allowing some overlap for seams and edges.
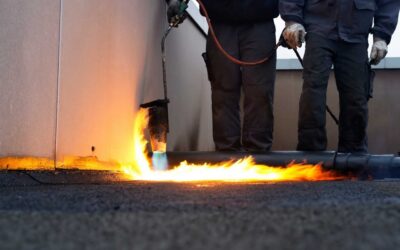
Step 3: Applying Adhesive or Mechanically Fastening
Rubber roofing can be installed using different methods:
- Fully Adhered: Adhesive is applied to the roof deck, and the membrane is rolled out and pressed down.
- Mechanically Fastened: Fasteners and plates secure the membrane to the roof deck, typically along seams and edges.
- Ballasted: The membrane is laid loose and held in place by a layer of gravel or pavers.
Step 4: Seaming and Detailing
Seams between sheets are sealed with special tape or liquid adhesives to create a watertight barrier. Details around vents, pipes, and flashing are carefully sealed.
Step 5: Final Inspection and Cleanup
After installation, the roof is inspected for any gaps, wrinkles, or bubbles. All debris and materials are cleaned up.
Maintenance Tips for Rubber Roofing Material
While rubber roofing is low-maintenance, proper care will extend its life and performance:
1. Regular Inspections
Inspect your roof twice a year and after severe weather for punctures, tears, or loose seams.
2. Cleaning
Remove debris like leaves and branches that can trap moisture and cause damage. Use a mild detergent and water for cleaning.
3. Repair Damage Promptly
Small punctures or tears can be repaired using patch kits specifically designed for rubber roofing.
4. Check Drainage
Ensure gutters and drains are clear to prevent standing water, which can stress the membrane.
Common Misconceptions About Rubber Roofing
Despite its many benefits, rubber roofing sometimes faces misconceptions:
- It’s Only for Flat Roofs: While it’s mostly used for flat or low-slope roofs, rubber roofing can be adapted to slightly pitched roofs as well.
- It Looks Unattractive: Modern EPDM membranes come in various colors, and professional installation can make the roof look sleek and clean.
- It’s Expensive: Rubber roofing is actually cost-competitive compared to other long-lasting roofing options.
- It’s Difficult to Repair: Rubber roofing repairs are generally straightforward and inexpensive.
Comparing Rubber Roofing Material With Other Roofing Types
To help you make an informed decision, here’s a comparison of rubber roofing with other common materials:
| Roofing Material | Durability | Cost | Maintenance | Energy Efficiency | Ideal For |
|---|---|---|---|---|---|
| Rubber (EPDM) | 30-50 years | Moderate | Low | High (white membranes) | Flat & low-slope roofs |
| Asphalt Shingles | 15-30 years | Low | Moderate | Moderate | Steep-slope residential |
| Metal Roofing | 40-70 years | High | Low | High | Residential & commercial |
| TPO Roofing | 20-30 years | Moderate | Moderate | High | Commercial flat roofs |
| Built-Up Roofing | 20-30 years | Moderate | Moderate | Low | Commercial flat roofs |
Environmental Impact of Rubber Roofing
With sustainability becoming more important, rubber roofing stands out as an eco-friendly option. EPDM roofing uses fewer petrochemicals compared to asphalt and can be recycled after its service life. The energy savings from reflective white rubber membranes also reduce a building’s carbon footprint by lowering cooling demands.
Signs You Need to Replace Your Rubber Roof
Even the best rubber roofing material won’t last forever. Watch for these signs indicating replacement might be necessary:
- Persistent leaks despite repairs
- Large tears or holes in the membrane
- Significant shrinking or cracking
- Excessive ponding water on the roof
- Membrane is past its warranty period
Rubber Roofing Cost Breakdown
While costs vary based on roof size, location, and installation method, here’s a rough estimate for rubber roofing material:
| Item | Estimated Cost Range |
|---|---|
| EPDM Material | $0.90 – $1.50 per sq. ft. |
| Installation Labor | $1.50 – $3.00 per sq. ft. |
| Accessories & Adhesives | $0.50 – $1.00 per sq. ft. |
| Total | $3.00 – $5.50 per sq. ft. |
Compared to other roofing types, rubber roofing offers a reasonable price point for a long-lasting solution.
FAQs About Rubber Roofing Material
Q1: How long does rubber roofing last?
A: Typically 30-50 years with proper installation and maintenance.
Q2: Is rubber roofing good for all climates?
A: Yes, it performs well in both hot and cold climates due to its flexibility and UV resistance.
Q3: Can I install rubber roofing myself?
A: While possible, professional installation is recommended to ensure durability and proper sealing.
Q4: Is rubber roofing environmentally friendly?
A: Yes, EPDM roofing is recyclable and energy-efficient.
Q5: How do I maintain a rubber roof?
A: Regular cleaning, inspections, and prompt repairs will keep it in good condition.
Conclusion: Is Rubber Roofing Material Right for You?
Rubber roofing material, particularly EPDM, is an excellent choice for flat and low-slope roofs offering durability, cost-effectiveness, and environmental benefits. Its ease of installation and low maintenance make it attractive for both residential and commercial properties.
If you’re looking for a roofing solution that provides long-lasting protection against the elements, helps reduce energy bills, and supports sustainability goals, rubber roofing material deserves serious consideration.
If you want expert advice or a professional quote on rubber roofing installation, feel free to reach out to local roofing contractors or roofing suppliers in your area.
Optimize your roofing investment with the resilient, affordable, and eco-friendly choice of rubber roofing material today!
Would you like me to help create a meta description, social media snippets, or an FAQ section to boost your SEO further?