(440) 307-2060
Drip Edge Installation:
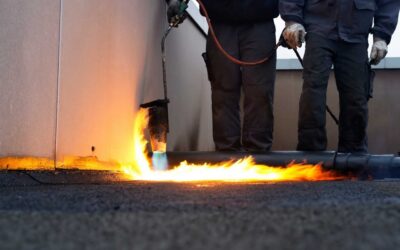
When it comes to protecting your roof and home from water damage, one of the most important components is something most homeowners have never even heard of—the drip edge. While it’s a small part of your roofing system, it plays a massive role in preventing moisture intrusion, preserving fascia boards, and maintaining the longevity of your entire roofing system. In this in-depth, 2800-word SEO blog, we explore everything you need to know about drip edge installation: what it is, why it’s important, types of drip edges, how it’s installed, common mistakes to avoid, and how a qualified roofing contractor like S&K Construction and Remodeling LLC ensures proper installation every time.
What Is a Drip Edge?
A drip edge is a metal flashing installed along the edges of your roof to direct water away from the fascia and into the gutters. Typically made from aluminum, galvanized steel, or copper, the drip edge is placed under the first course of shingles and extends slightly over the fascia board. It serves as a critical barrier that prevents wind-driven rain from sneaking under the shingles or behind the gutters.
Why Drip Edge Installation Matters
1. Protects Fascia and Roof Decking
Water has a sneaky way of finding vulnerabilities in a roof. Without a drip edge, rainwater can seep behind gutters and rot your fascia board and roof decking. This can lead to expensive structural repairs.
2. Prevents Ice Dams and Wind Damage
In colder climates, drip edges help manage snowmelt and prevent ice dams. They also shield roof edges from wind-driven rain, reducing the risk of damage during storms.
3. Increases Roof Lifespan
By improving water flow and reducing standing moisture, drip edges significantly extend the life of your roofing system.
4. Meets Building Code Requirements
Modern building codes (including the International Residential Code) often require drip edge installation for all new roof systems. Failure to include one can result in failed inspections.
Types of Drip Edge Profiles
There are three main types of drip edges:
1. Type C (L-Style)
The L-style has a simple 90-degree bend and is best suited for steep-slope roofs. It is commonly used in older homes and can be tucked under the underlayment.
2. Type D (T-Style)
Also called “D-metal,” this is the most popular style today. Its unique T-shape allows water to run further from the fascia, offering better protection and compatibility with most gutters.
3. Type F (Gutter Apron)
Used when installing new gutters on an existing roof, this style extends further back on the roof deck and over the fascia, making it ideal for retrofits.
Drip Edge Materials
1. Aluminum
- Lightweight and corrosion-resistant
- Available in many colors to match trim and gutters
- Most commonly used for residential installations
2. Galvanized Steel
- Very durable and strong
- Heavier than aluminum
- May rust over time if not properly coated
3. Copper
- Long-lasting and aesthetically pleasing
- Expensive but corrosion-proof
- Typically used on luxury homes and historical restorations
Drip Edge Installation: Step-by-Step Guide
Proper installation is critical for the drip edge to function effectively. Here’s how professional roofers like S&K Construction and Remodeling LLC get it right:
Step 1: Install Drip Edge Along Eaves First
The drip edge should be placed along the eaves before the underlayment is installed. This ensures that any water getting under the shingles is directed away from the roof.
Step 2: Lay Down Underlayment
The underlayment is rolled out and secured, overlapping the drip edge at the eaves. This layering creates a water-tight seal.
Step 3: Install Drip Edge Along the Rakes
On the gable ends (rakes), the drip edge goes on top of the underlayment. This configuration ensures water doesn’t get under the roof deck.
Step 4: Secure with Roofing Nails
Roofing nails should be placed every 8-10 inches. Stainless steel or galvanized nails are preferred to prevent rusting.
Step 5: Seal Joints and Corners
Where two pieces of drip edge meet, overlap by at least 2 inches and seal with roofing cement or caulk for a continuous barrier.
Step 6: Inspect for Proper Alignment
Each section should be visually inspected to ensure it is straight, secure, and properly overlapped to direct water flow.
Common Drip Edge Installation Mistakes to Avoid
1. Installing on Top of the Underlayment at the Eaves
This mistake traps water and allows it to seep into the decking. Always install drip edge below the underlayment at the eaves.
2. Using Incompatible Materials
For example, aluminum in contact with treated wood or copper can lead to galvanic corrosion. Always choose compatible materials.
3. Improper Overlapping
Failing to overlap joints properly leaves gaps for water to infiltrate.
4. Nailing Too Close to the Edge
This can cause the metal to warp or come loose during high winds.
5. Skipping Sealants at Joints
Sealants help close gaps between overlapping pieces and prevent moisture intrusion.
How Much Does Drip Edge Installation Cost?
Drip edge installation is often included in a full roof replacement. Here are general costs:
- Material Cost: $1.00 to $3.00 per linear foot depending on the metal
- Labor Cost: $2.00 to $4.00 per linear foot for professional installation
- Total: $3.00 to $7.00 per linear foot
For a 2000 sq. ft. home, expect to spend $400 to $1200 for drip edge installation alone.
Is DIY Drip Edge Installation a Good Idea?
While drip edge installation may appear straightforward, roofing is a dangerous and technical job. Improper installation can result in leaks, mold, structural rot, and a voided roof warranty. Hiring experienced professionals ensures the job is done right the first time.
Drip Edge Installation During Roof Replacement vs. Retrofitting
During New Roof Installation
This is the ideal time to install or upgrade the drip edge. Everything is accessible, and the integration with shingles and underlayment can be done seamlessly.
Retrofitting Drip Edge on an Existing Roof
This is more complex but still possible. Roofing contractors may need to lift shingles or trim back the first course. Type F (gutter apron) is often used for retrofits.
Local Building Codes and Drip Edge Requirements
Ohio, like many states, follows the International Residential Code (IRC), which requires drip edge on all eaves and rakes:
- Must be mechanically fastened
- Overlapped a minimum of 2 inches
- Extend at least 2 inches onto the roof deck
- Be integrated properly with underlayment
Skipping the drip edge or doing it improperly can lead to inspection failures.
How S&K Construction and Remodeling LLC Ensures Proper Installation
Based in Jefferson, Ohio, S&K Construction and Remodeling LLC services Ashtabula County and all of Northeast Ohio. As an Owens Corning Preferred Contractor, we follow manufacturer guidelines and building codes to a tee. Here’s why clients trust us:
- Certified Installers trained in proper flashing techniques
- Thorough Roof Inspections to identify and address potential issues before they become costly
- High-Quality Materials backed by strong manufacturer warranties
- 5-Star Google Reviews from satisfied homeowners
- Clear Communication and Transparent Pricing every step of the way
FAQs About Drip Edge Installation
Q: Can I reuse my old drip edge?
A: It is not recommended. Older drip edge may be corroded or bent, and it won’t integrate well with new shingles or underlayment.
Q: Do all roof types need a drip edge?
A: Yes. While flat roofs have different flashing requirements, all sloped roofs benefit from proper drip edge installation.
Q: What color should my drip edge be?
A: Most homeowners choose a color that matches the gutters or fascia. Many manufacturers offer dozens of color options.
Q: Can I install drip edge without replacing my roof?
A: Yes, but it’s more complicated and may not provide the same level of protection as full integration during a roof replacement.
Final Thoughts: Don’t Overlook the Importance of Drip Edge Installation
While it’s one of the smallest components of your roof, the drip edge plays a big role in protecting your home from water damage, ice dams, and rot. Whether you’re installing a new roof or upgrading your existing system, ensuring the drip edge is correctly chosen and installed is a must.
If you’re in Jefferson, Ashtabula County, or anywhere in Northeast Ohio, and you’re looking for a roofing contractor you can trust, reach out to S&K Construction and Remodeling LLC. Our expert team will make sure every detail—from shingles to flashing to drip edge—is done to perfection.
Call us today for a free roof inspection and find out how a properly installed drip edge can protect your biggest investment: your home.