(440) 307-2060
Introduction: What Is Roof Flashing & Why It Matters
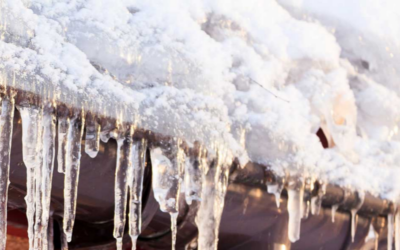
Flashing On The Roof is a thin, durable material—typically metal—that’s installed at vulnerable points of a roof to direct water away from joints and prevent leaks and structural damage. These areas include seams, transitions, protrusions, and roof edges. Flashing is a cornerstone of effective waterproofing, essential in preserving your home’s safety and longevity
Key Functions
- Stops water intrusion — Flashing diverts rain and melting snow down the roof and into gutters, protecting penetration points like chimneys, vents, valleys, and headwalls
- Preserves structural integrity — By preventing moisture from seeping in, it hinders rot, mold, and attic decay
- Enhances energy efficiency — Properly sealed roofs maintain temperature control, reducing HVAC workload
- Extends roof lifespan — Less moisture-related wear and tear means fewer repairs and longer performance
- Boosts home value — A dry, damage-free roof improves appeal to buyers and protects your investment (
Types of Roof Flashing
Here’s a breakdown of common types and when they’re used:
- Step Flashing
- Used where a roof meets a vertical surface like a wall or dormer.
- Consists of overlapping L-shaped metal pieces under shingles, directing water away
- DIYers and professionals both stress its importance. One home improvement user shared:“Water… went under shale edge, seeped and spread under shingles… no step flashing… resulted in rotted structure.” .
- Base and Counter Flashing
- Common around chimneys and masonry.
- Base flashing attaches to the roof, while counter flashing attaches to the vertical element—allowing for expansion and watertight overlap
- Apron (Continuous) Flashing / Headwall Flashing
- A single strip over joints like where the roof abuts a wall; also called headwall or gutter apron flashing (
- Drip Edge Flashing
- Installed along eaves and rakes to guide water into gutters and protect fascia and decking
- Valley Flashing
- V-shaped channel between intersecting roof slopes, preventing pooling in valleys
- Pipe/Vent Flashing (Pipe Boot)
- A collar around pipes or roof penetrations, sometimes rubberized for flexibility
- Cricket Flashing
- Installed behind chimneys or large penetrations to divert water away. It’s a ridge-like structure that prevents water buildup (
- Reglet Flashing
- A groove cut in masonry to insert counter flashing. Face reglets are visible metal strips screwed to walls, often made of copper or lead-coated copper
Flashing Materials: What to Use & Why
Common materials include:
- Galvanized steel & aluminum — Affordable, easy to work with, though aluminum may corrode without proper coating .
- Copper — Exceptionally durable, malleable, corrosion-resistant, and long-lasting. Ideal for complex roof shapes and high longevity .
- Stainless steel — Offers strong corrosion resistance, especially in harsh or coastal environments
- Zinc alloy, lead-coated copper — Premium options with high durability
- Flexible flashings — Rubberized asphalt, adhesive-backed materials—great for tight spaces but not ideal for long-term waterproofing .
- Lead — Traditional and durable, but environmentally sensitive today.
Material Selection Tips
- Copper and stainless steel for longevity and corrosion resistance.
- Aluminum if cost-efficiency is key, but beware saltwater or treated wood conditions.
- Ensure compatibility between metals to avoid galvanic corrosion
Installation Best Practices
- Preparation
- Clean surfaces, remove old flashing or debris, and lay down underlayment
- Proper fit & overlap
- Align flashing to roof contours and overlap pieces by at least 6 inches to ensure water is directed outward
- Fastening
- Use roofing nails or screws; some recommend gasketed screws over nails for long-term durability
- Space fasteners about 12 inches apart, and avoid penetrating upper surfaces unnecessarily
- Sealing
- Apply high-quality roof sealant on joints, overlaps, nail holes, and critical seams
- Testing
- Conduct a hose test after installation to catch leaks early
- Attention to detail
- Hem exposed edges for durability, use reglets on masonry, and integrate cricket flashing behind large penetrations (
One homeowner warned of missing step flashing after damage occurred; ensuring step flashing is explicitly included in roofing contracts is key
Maintenance & Inspection Checklist
- Annual inspections — Look for rust, corrosion, loose pieces, or missing flashing. Windows to check: after storms, in the attic, and ceilings below flashings .
- Signs of flashing problems — Watch for water stains, damp attic wood, and visible daylight around pipes
- Age-based replacement — Aluminum and galvanized steel last ~20 years; copper may last much longer (
- Repairs vs. full replacement during re-roofing — Reusing solid flashing can be fine, but damaged or aged flashing should be replaced. Some roofing quotes say “installed as necessary,” but be cautious—it may lead to future issues
DIY vs. Professional Installation
DIY Pros & Cons:
Pros – Saves money; manageable for small repairs.
Cons – Risk of improper fit, safety hazards, and missing details like proper overlap or sealing.
Why Pros Win:
- They understand material compatibility, ensure code compliance, and integrate flashing into an overall waterproof system .
- Improper methods—like exposed nails or silicone-only fixes—may fail over time.
- In a community discussion, one user said about step flashing failures:“Flashing is an essential part of the system, not an optional extra.”
Environmental & Long-Term Value Considerations
- Sustainable materials — Recycled metals and long-lasting options reduce waste and environmental impact
- Energy efficiency — Correct flashing keeps insulation dry, ensuring peak performance and lower heating/cooling bills
- Long-term cost savings — Investing upfront in quality materials and workmanship helps avoid expensive water damage and premature roof failure
Conclusion & SEO-Focused Wrap-Up
Roof flashing is non-negotiable in any effective roofing system. Without it, vulnerable zones like chimney bases, wall intersections, skylights, roof valleys, and edges become major risk points for leaks and structural damage.
Best practices include:
- Using the right type of flashing for each roof area—step, counter, drip edge, valley, pipe boot, cricket, and reglet.
- Choosing materials fitted to your climate and longevity goals—copper and stainless steel for lasting performance, aluminum or galvanized steel for cost-conscious builds.
- Ensuring precise installation—clean surfaces, adequate overlap, sealed joints, and proper fastening.
- Conducting maintenance—yearly inspections, quick leak repairs, and timely flashing replacements when necessary.
- Hiring professionals for complex jobs—especially large re-roofs or critical flashings like chimneys.
Implementing these strategies doesn’t just protect your home from water intrusion—it also saves you money, boosts energy efficiency, supports environmental sustainability, and bolsters your property’s long-term value.