(440) 307-2060
Hip Roof Addition: Your Complete Guide to Extending with Style & Structure
Expanding your home footprint often involves adding an extension—whether it’s a kitchen bump‑out, bedroom wing, or covered patio. Matching the new section’s roof to your existing hip roof enhances aesthetic continuity and structural integrity. This guide explores everything you need to know about planning, designing, building, and enjoying a seamless hip roof addition.
Table of Contents
- What Is a Hip Roof Addition?
- Why Choose a Hip Roof Extension?
- Common Types of Hip Roof Additions
- Planning & Design Phase
- Structural & Framing Requirements
- Roof Integration & Flashing Techniques
- Insulation, Ventilation & Energy Considerations
- Roofing Materials & Matching Aesthetics
- Budgeting & Cost Breakdown
- Working with Architects & Contractors
- DIY vs Hiring Professionals
- Common Challenges & Solutions
- Permits, Codes & Inspections
- Project Timeline Overview
- Maintenance & Longevity
- Home Value & ROI
- Frequently Asked Questions
- Summary & Next Steps
1. What Is a Hip Roof Addition?
A hip roof addition is an extension built onto your existing structure where the new roof features hip-style slopes on all sides. These slopes meet at ridges and hips, seamlessly blending southern or western wings into your home.
Instead of a simple shed or gable roof that might clash with your architecture, a hip roof extension ensures visual and structural harmony.
2. Why Choose a Hip Roof Extension?
Adding a hip roof has clear advantages:
- Aesthetics & Cohesion: Maintains roofline symmetry across your entire structure.
- Structural Strength: Hip roofs resist wind uplift—important for lateral-mounted wings.
- Improved Drainage: Multiple slopes reduce pooling and wear.
- Efficiency: Continuous eaves offer shading and consistent insulation performance.
- Resale Value: Extensions that match the existing roof style boost home appeal and valuation.
3. Common Types of Hip Roof Additions
Depending on the type of addition, you have several framing and roofing choices:
A. Flush Hip Addition
Roof ridge extends into the new wing at the same height; rafters continue across.
Ideal for shallow home extensions.
B. Cross‑Hip Roof
New ridge intersects existing ridge at right angle; requires valleys and hips.
Popular for L-shaped or side additions.
C. Shed-Out Hip Wing
A lower hip links into the main roof via valley.
Suitable for guest suites or sunroom bump-outs.
D. Gambrel-Hip or Two‑Tier Hip
Adds architectural interest with a secondary ridge or break.
Great for height or second-floor additions.
4. Planning & Design Phase
A. Demand Analysis
Clarify function: bedroom, kitchen, sunroom, bonus space.
Estimate square footage (e.g., 12×16 bump-out).
B. Roof Geometry Planning
Pitch should match existing roof unless a style shift is intended.
Locate where new rafters, ridge, hips, and valleys meet the original.
C. Structural Drawing
Have an architect or designer lay out framing, load paths, rafter connections, beams, headers, and wall reinforcement.
D. Utility & Interior Coordination
Plan for HVAC, wiring, plumbing, windows, and ceiling finish height (vaulted or flat ceiling).
Ensure roof framing doesn’t conflict with interior systems.
5. Structural & Framing Requirements
A. Load Path & Support
New rafters must land on load-bearing walls, beams, or headers.
Cross-hips and valleys will carry roof load into corner framing assemblies.
B. Roof Framing Integration
Options:
- Common rafters tie into new ridge.
- Hip rafters define quarter‑hips at corners.
- Valley rafters mediate between new and old roofs.
All carry dead loads (roof material) and live loads (snow/wind).
C. Headers & Beams
For large openings or garage conversions, double LVL beams often support the framing load.
D. Ceiling Joists or Collar Ties
Crucial when extending ceiling planes to prevent rafter spread.
E. Foundation & Flooring
Use matching footings/slab thickness and layout to support new walls and roof load.
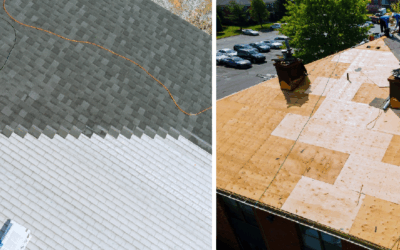
6. Roof Integration & Flashing Techniques
A. Valley Flashing
Key water barrier where roofs intersect; needs step and apron flashing layered with roofing underlayment.
B. Ice & Water Barrier
Installed 2–4 ft along valleys, eaves, and wall intersections.
C. Step Flashing at Wall Intersections
Prevents water intrusion where roof meets vertical siding.
D. Continuity at Soffits & Fascia
Match soffit depth and fascia trim to avoid visible breaks.
Install continuous gutters and downspouts to divert water away from addition junctions.
E. Ridge & Hip Flashing
Use matching ridge caps with tight sealant and proper nailing.
7. Insulation, Ventilation & Energy Considerations
A. Insulation Plane
Match new attic space R-value with existing attic to maintain consistent energy performance.
B. Ventilation Continuity
Maintain soffit and ridge vent pathways across the junction.
Cross-hip additions need ridge vent vents aligned with new attic space.
C. Air Sealing
Seal top plates, seams at valley flashings, and plumbing/wiring penetrations.
D. HVAC Planning
Small additions (<200 ft²) may share existing system; larger ones may require mini-split or duct extension.
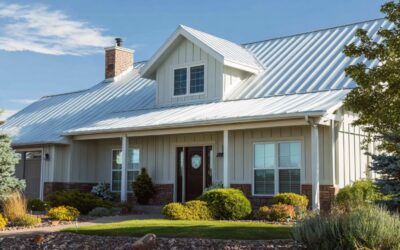
8. Roofing Materials & Aesthetic Matching
A. Shingles
Use same brand, color, and profile as existing roof. If the existing roof is aged, consider re‑shingling the entire home.
B. Metal Panels
Match seam style and panel width for consistent appearance.
C. Tiles or Slated Roofing
Match size, layout, exposure, and pattern for seamless aesthetics.
D. Ridge & Hip Accessories
Use matching ridge caps and hip tiles/metal caps to complete the look.
9. Budgeting & Cost Breakdown
Cost Drivers
- Structural complexity: Cross-hips drive up labor cost.
- Footings & foundation modifications
- Freight & trucking
- Perfec Flashing & material matching
Ballpark Figures
- Simple flush addition (200 ft²): $25K–$40K
- Cross-hip addition with dormer: $40K–$70K
- Tile/metal extension: +20–40% in roofing materials
Include 10% for contingencies and 5–10% for permit/design costs.
10. Working with Architects & Contractors
A. Architect
Provide schematic drawings showing roof junctions, interior spacial planning, and structural load paths.
B. Contractor
Look for experience in hip framing and seamless roof integration.
Evaluate bid clarity: scope, allowances, production schedule.
C. Subcontractors Coordination
Roofers, framers, insulators, HVAC and siding specialists must coordinate at intersection seams.
D. Contract Details
Include scope, material spec, permit handling, inspections, cleanup, and warranty standards.
11. DIY vs Hiring Professionals
DIY suitable for smaller additions by experienced carpenters. Complex cross-hip or vaulted additions require licensed professionals.
12. Common Challenges & Solutions
- Valley leaks – use step flash, ice-water barrier, self-sealing roofing shingles.
- Utility conflict in rafters – coordinate MEP before framing.
- Roof matching challenges – sometimes re-roof entire home yields best aesthetic.
- Thermal bridging – continuous insulation and taped sheathing can solve this.
- Drainage overload – oversized gutters or extra downspout needed at valley runoff.
13. Permits, Codes & Inspections
A. Permitting
Adding square footage triggers structural, energy, and stormwater review.
Include site plan, framing plan, energy calc.
B. Inspections
Expected phases:
- Footing/foundation
- Shear wall/framing
- Pre-insulation (HVAC/MEP rough)
- Energy/insulation
- Final builds
C. Code Compliance
IECC, IRC, wind/snow codes vary by region—your designer must match load and energy compliance.
14. Project Timeline Overview
| Phase | Time Estimate |
|---|---|
| Design | 2–4 weeks |
| Permitting | 3–6 weeks (varies regionally) |
| Foundation | 1 week |
| Framing | 1–2 weeks |
| Roofing | 1 week |
| Exterior | 2–3 weeks |
| Interior | 2–4 weeks |
| Final Touch | 1 week |
| Total | ~12–20 weeks |
15. Maintenance & Long-Term Longevity
- Keep valleys and gutters clean.
- Repaint trim every 5–7 years.
- Inspect flashing and roof intersections annually.
- Reseal ridge caps and hips when boots and shingles age.
16. Home Value & Return on Investment
Hip roof extensions often deliver strong ROI. ROI-related benefits:
- Added livable space and square feet.
- Seamless architectural addition boosts resale.
- Enhances curb appeal and energy performance.
Expect 60–80% recoup in comparable markets, potentially higher value in certain neighborhoods.
17. Frequently Asked Questions
Q1: Can my existing roofing handle matching extension?
A: You may need a roof replacement depending on age and material stock.
Q2: Is energy efficiency maintained?
A: Yes—if you properly insulate, air‑seal and coordinate ventilation.
Q3: How do I prevent cracking at valley seams?
A: Use ice barrier, step flashing, and ridge overlap per manufacturer specs.
Q4: Will interior ceiling lines remain aligned?
A: Yes—by tying ceiling joists or collar ties, you can avoid ceiling droop.
Q5: How far can I extend?
A: Footprint expansion limited by site restrictions, structural limit, and permit zone setbacks.
18. Summary & Next Steps
A hip roof addition brings beauty, function, and resilience when thoughtfully designed and built. By aligning roof pitch, framing load paths, drainage, and materials, you create an improved, cohesive home space.
Next steps:
- Sketch your proposed addition with dimensions and roof outline
- Contact an designer/contractor to draft structural drawings
- Apply for building permits with included plans
- Prepare site and begin construction
- Monitor inspectors and craftspeople during framing, roofing, and finishing