(440) 307-2059
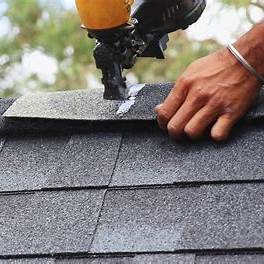
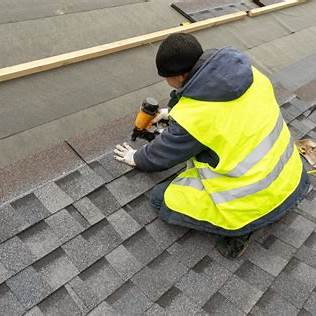
iturn0image0turn0image3turn0image4turn0image5Installing asphalt shingles is a fundamental skill for roofing professionals and DIY enthusiasts alike. Proper installation ensures the longevity and effectiveness of your roof. Below is a comprehensive guide outlining the essential steps for installing asphalt shingles.
1. Safety First
Before beginning any roofing project, prioritize safety:
- Use Proper Safety Equipment: Wear a safety harness, non-slip shoes, and a hard hat.
- Secure the Work Area: Ensure ladders are stable and the work area is free from obstructions.
- Weather Conditions: Avoid working on the roof during wet or windy conditions.
Adhering to safety protocols minimizes the risk of accidents and injuries.
2. Understand the Physics of a Sloped Shingle Roof
Asphalt shingles function by shedding water down the slope of the roof:
- Gravity-Driven: Shingles are designed to overlap, allowing water to flow over them and off the roof.
- Proper Overlapping: Each shingle layer must overlap the one below to prevent water infiltration.
Understanding this principle is crucial for effective shingle installation.
3. Deck Preparation
A solid foundation is essential:
- Inspect the Roof Deck: Ensure the decking is dry, clean, and securely fastened.
- Repair Damaged Areas: Replace any rotten or damaged sections of the decking.
- Clean the Surface: Remove debris, nails, and old roofing materials.
A well-prepared deck ensures the shingles lay flat and adhere properly.
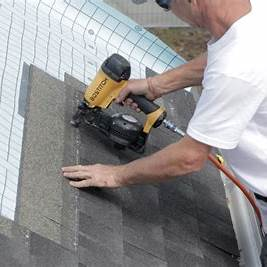
4. Work from the Bottom Up
Begin installation at the lowest point of the roof and progress upward:
- Install Drip Edge: Place metal drip edge along the eaves to direct water away from the fascia.
- Lay Starter Shingles: Apply starter shingles along the eaves to provide a secure base for the first row.
- Begin Shingle Installation: Start with the first course of shingles, ensuring proper alignment and overhang.
Working from the bottom up ensures each layer overlaps correctly, promoting effective water shedding.
5. Ice Dam Protection at the Eaves
In colder climates, ice dams can cause significant damage:
- Install Ice and Water Shield: Apply a self-adhering membrane along the eaves to prevent water backup.
- Extend Protection: Ensure the membrane extends at least 24 inches inside the exterior wall line.
This barrier helps prevent leaks caused by melting ice and snow.
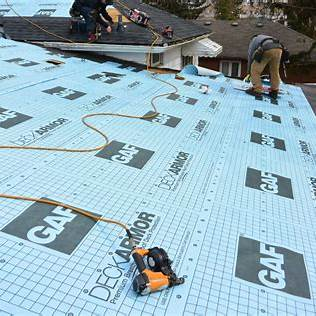
6. Underlayment for Overall Secondary Roof Protection
Underlayment provides an additional layer of protection:
- Choose the Right Material: Options include asphalt-saturated felt or synthetic underlayment.
- Install Properly: Roll out the underlayment horizontally, overlapping each row by at least 2 inches.
- Secure in Place: Use roofing nails or staples to fasten the underlayment to the deck.
This layer acts as a moisture barrier beneath the shingles.
7. Covering the Joints and Valleys
Valleys and joints are vulnerable areas:
- Install Valley Flashing: Place metal flashing in open valleys to direct water flow.
- Weave Shingles: In closed valleys, weave shingles from both sides to ensure coverage.
- Seal Joints: Apply roofing cement to seal joints and prevent water penetration.
Proper treatment of these areas prevents leaks and extends roof life.
8. The Shingles in the “Field” of the Roof
This refers to the main area of the roof:
- Align Shingles: Use chalk lines to maintain straight rows.
- Stagger Seams: Offset each row to prevent water from seeping through aligned seams.
- Nail Correctly: Place nails just below the adhesive strip, avoiding overdriving.
Consistent installation ensures durability and aesthetic appeal.
9. The Hip and Ridge Caps
These components cover the roof’s peaks:
- Cut Ridge Cap Shingles: Use standard shingles cut into thirds or specialized ridge cap shingles.
- Install from the End: Begin at the end opposite prevailing winds to prevent uplift.
- Overlap Properly: Each cap should overlap the previous one by at least 5 inches.
Proper installation of hip and ridge caps seals the roof and enhances its appearance.
By following these steps meticulously, you can ensure a successful asphalt shingle installation that offers lasting protection and performance.