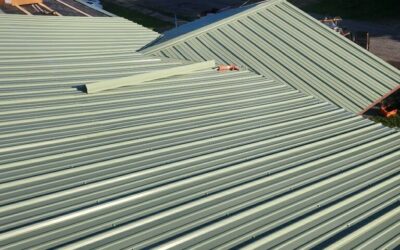
Quick Answer: A professional roof replacement typically includes a roof inspection, selecting roofing materials, protecting your property, removing the old roof, inspecting the roof decking, replacing damaged wood when necessary, installing underlayment and flashing, installing new roofing materials, improving ventilation, performing a final inspection, and cleaning the job site.
Each step plays an important role in creating a roof that lasts for decades, not just a few years.
Most homeowners never watch a roof being replaced from start to finish.
They see the old shingles disappear in the morning and return home to a brand-new roof a day or two later. What happens in between is often a mystery.
Understanding the roofing steps involved in a roof replacement helps you know what you’re paying for, what questions to ask your contractor, and what to expect while the work is taking place. More importantly, it helps you recognize the difference between a complete roofing system and a project that cuts corners.
A quality roof is much more than shingles. Hidden components such as roof decking, underlayment, flashing, ventilation, and proper installation all work together to protect your home from water, wind, snow, and changing temperatures.
That’s especially important here in Northeast Ohio, where roofs must withstand freezing winters, heavy rain, strong winds, summer heat, and everything in between. A roof that isn’t installed correctly may develop problems long before the shingles reach the end of their expected lifespan.
In this guide, we’ll walk you through every major step of a professional roof replacement, explain why each stage matters, and show you what you should expect from an experienced roofing contractor.
Why Understanding Roofing Steps Matters
Replacing a roof is one of the largest investments many homeowners will make.
If you don’t understand the process, it’s easy to compare contractors based only on price. Unfortunately, the lowest estimate doesn’t always include the same level of workmanship or materials.
For example, one contractor may include:
- New underlayment
- Ice and water protection
- Drip edge replacement
- Roof ventilation upgrades
- Flashing replacement
- Roof decking repairs
Another contractor may leave some of those items out to offer a lower price.
That’s why knowing the roofing process helps you compare estimates fairly and understand exactly what’s included in your roof replacement.
What Does a Complete Roof Replacement Include?
Many people think replacing a roof simply means installing new shingles.
In reality, shingles are only the visible layer.
A complete roofing system is made up of several components that work together to protect your home from moisture and weather.
A professional roof replacement may include:
- Roof inspection
- Removal of existing roofing materials
- Roof decking inspection
- Replacement of damaged roof sheathing
- Ice and water barrier installation
- Roofing underlayment
- New drip edge
- Flashing replacement around chimneys, skylights, and vents
- Ridge ventilation improvements
- Installation of new shingles or metal roofing
- Final quality inspection
- Complete site cleanup
Each component contributes to the overall performance of your roof. Skipping even one important step can shorten its lifespan or increase the risk of future leaks.
Before the First Shingle Comes Off
One of the biggest surprises for homeowners is that a roof replacement actually begins before the roofing crew starts removing shingles.
Professional contractors spend time preparing both the home and the job site to help protect landscaping, windows, siding, and outdoor belongings.
Preparation often includes covering flower beds, positioning debris trailers, moving outdoor furniture when needed, and creating safe work areas around the property.
This planning reduces cleanup time, protects your property, and allows the installation team to work more efficiently once the project begins.
A well-organized project usually reflects a well-organized roofing company.
Step 1: A Professional Roof Inspection
Every successful roof replacement begins with one thing: a thorough inspection.
Before discussing shingles, colors, or pricing, a roofing contractor needs to understand the condition of the entire roofing system. Problems hidden beneath the surface can affect the installation process and even the lifespan of your new roof.
During an inspection, the contractor typically checks:
- Missing or damaged shingles
- Roof age
- Flashing around chimneys and vents
- Signs of leaks
- Roof decking condition
- Attic ventilation
- Gutters and drainage
- Storm or hail damage
This inspection helps determine whether a complete roof replacement is necessary or if repairs are still a practical option.
For homeowners in Northeast Ohio, inspections are especially important after winter or severe storms because damage isn’t always visible from the ground.
Step 2: Choosing the Right Roofing Material
Once the inspection is complete, it’s time to choose the roofing material that best fits your home.
Many homeowners focus on appearance first, but durability, weather performance, and long-term value should carry just as much weight.
Common roofing materials include:
Asphalt Shingles
The most popular choice for residential homes because they offer a great balance of affordability, durability, and curb appeal.
Architectural shingles are especially common in Northeast Ohio due to their improved wind resistance and longer lifespan.
Metal Roofing
Metal roofs have become increasingly popular because they last longer and require very little maintenance.
They’re an excellent choice for homeowners planning to stay in their home for many years.
Flat Roofing Systems
Homes with flat or low-slope roof sections often require materials such as TPO, EPDM, or PVC instead of shingles.
Each material has different installation requirements, so selecting the right system is important.
A good contractor will explain the advantages and disadvantages of every option instead of recommending the same product for every home.
Step 3: Preparing Your Home Before Installation
Roof replacement is a major construction project, even when everything goes smoothly.
Preparing your property helps protect your belongings and allows the installation crew to work safely and efficiently.
Before work begins, homeowners should:
- Move vehicles away from the driveway.
- Remove fragile decorations from walls and shelves.
- Cover valuable items stored in the attic.
- Secure patio furniture and grills.
- Keep children and pets away from the work area.
- Inform neighbors if necessary.
Professional roofing companies also prepare the property by placing protective coverings around landscaping and positioning equipment to reduce the risk of damage during the project.
Good preparation makes the installation process safer for everyone involved.
Step 4: Removing the Existing Roof
With preparations complete, the crew begins removing the old roofing materials.
This stage is often called the roof tear-off.
Instead of installing new shingles over old ones, experienced contractors usually remove the existing roofing so they can inspect every layer underneath.
A complete tear-off allows the crew to:
- Find hidden moisture damage
- Check the roof decking
- Replace worn flashing
- Install a completely new roofing system
- Improve the overall lifespan of the roof
Although this step creates the most debris, it also provides the opportunity to correct problems that would otherwise remain hidden.
Step 5: Inspecting the Roof Decking
Once the old roofing has been removed, the wooden surface beneath becomes visible.
This layer, known as the roof decking, forms the foundation of the entire roofing system.
Even if the old shingles looked acceptable from outside, damaged decking can still be discovered after the tear-off.
Roof decking is carefully inspected for:
- Soft spots
- Rot
- Water damage
- Mold
- Loose panels
- Structural weakness
Installing new shingles over damaged decking would reduce the life of the entire roof.
That’s why reputable contractors inspect this layer before moving forward.
Step 6: Replacing Damaged Roof Sheathing
If damaged wood is found during the inspection, it should be replaced before the new roofing materials are installed.
Roof sheathing provides the solid surface that supports every layer above it.
Replacing damaged sections now prevents future issues like sagging, leaks, or weakened structural support.
Although homeowners sometimes worry when additional repairs are discovered, replacing damaged sheathing during the project is usually much less expensive than repairing interior water damage later.
A quality roofing company documents these repairs and explains exactly why they’re needed before continuing.
Step 7: Installing Underlayment
With a solid roof deck in place, the next layer is the roofing underlayment.
Many homeowners never see this material, but it’s one of the most important parts of a complete roofing system.
Underlayment acts as a secondary barrier against moisture if water ever gets beneath the shingles.
Depending on the roof design, contractors may install:
- Synthetic underlayment
- Ice and water shield
- Moisture barriers in vulnerable areas
Homes in Northeast Ohio benefit from ice and water protection because winter weather can create ice dams that force water beneath shingles.
Installing quality underlayment helps provide an extra layer of defense during every season.
Step 8: Installing Flashing and Drip Edge
Before the new roofing material goes on, metal components are installed in areas where water is most likely to collect.
These include:
- Around chimneys
- Plumbing vents
- Skylights
- Roof valleys
- Wall intersections
New drip edge is also installed along the roof edges to guide rainwater into the gutters instead of allowing it to reach the roof decking.
These pieces may not be as noticeable as shingles, but they play a major role in preventing leaks.
Many roof failures begin around flashing, not across the field of the roof itself.
Installing these components correctly helps ensure your new roof remains watertight for years.
Step 9: Installing the New Roofing Material
Now comes the part most homeowners look forward to seeing.
Once the roof deck, underlayment, and flashing are in place, the new roofing material is installed. While shingles get most of the attention, they only perform well when every layer underneath has been installed correctly.
For most homes in Northeast Ohio, architectural asphalt shingles are the preferred choice because they offer dependable protection against wind, rain, snow, and changing temperatures. Some homeowners choose metal roofing for its long lifespan and modern appearance.
During installation, roofing crews carefully align each row, secure every section according to manufacturer guidelines, and make sure vulnerable areas receive extra attention.
This stage requires precision because even small installation mistakes can lead to leaks or reduce the roof’s lifespan.
Step 10: Installing Ridge Caps and Improving Ventilation
A roof isn’t complete after the last shingle is installed.
The highest point of the roof, known as the ridge, also needs protection.
Ridge caps cover this area while helping create a finished appearance. Many modern roofing systems also include ridge vents that improve attic airflow.
Good ventilation offers several benefits:
- Reduces heat buildup during summer
- Helps control moisture inside the attic
- Lowers the risk of mold growth
- Helps prevent ice dams during winter
- Supports a longer roof lifespan
Many roofing problems blamed on shingles are actually caused by poor ventilation. That’s why experienced contractors inspect the attic as part of the roof replacement process instead of focusing only on the roof’s exterior.
Step 11: Final Inspection
Before a roofing project is considered complete, every part of the installation should be inspected.
This final walkthrough is one of the most important roofing steps because it confirms that the new roofing system has been installed correctly.
A professional inspection typically includes checking:
- Shingle alignment
- Flashing installation
- Ridge caps
- Roof ventilation
- Roof penetrations
- Sealant application
- Overall workmanship
If adjustments are needed, they’re completed before the project is signed off.
This extra attention helps ensure your new roof performs exactly as expected from day one.
Step 12: Cleanup and Project Completion
A quality roofing company doesn’t finish when the last shingle is nailed down.
Cleaning the property is part of the job.
Roof replacement creates thousands of nails, old shingles, packaging materials, and wood scraps. Leaving debris behind creates safety hazards and leaves homeowners with unnecessary work.
Professional cleanup usually includes:
- Removing old roofing materials
- Collecting loose nails with magnetic tools
- Cleaning driveways and walkways
- Removing debris from flower beds
- Inspecting the yard one final time
Before leaving, many contractors also explain the warranty, answer any remaining questions, and provide maintenance recommendations to help homeowners protect their investment.
Should You Replace Your Roof Yourself?
Many homeowners search for DIY roof replacement hoping to save money.
While replacing a few shingles may seem manageable, a full roof replacement is a completely different project.
Working on a roof involves steep slopes, heavy materials, specialized equipment, and significant safety risks. One mistake can lead to serious injuries or costly repairs.
DIY roof replacement can also create problems such as:
- Incorrect installation
- Water leaks
- Damaged roof decking
- Poor attic ventilation
- Voided manufacturer warranties
- Higher repair costs later
For most homeowners, hiring an experienced roofing contractor provides better long-term value than attempting a full replacement without professional training.
Frequently Asked Questions
What Does a New Roof Include?
A complete roof replacement includes much more than new shingles. Depending on the condition of your existing roof, the project may include roof decking repairs, underlayment, ice and water protection, flashing replacement, drip edge, ventilation improvements, and new roofing materials.
How Long Does a Roof Replacement Take?
Most residential roof replacements are completed within one to three days.
The timeline depends on factors such as roof size, weather conditions, roof complexity, and whether hidden repairs are discovered after the old roof is removed.
What Is the First Step in a Roof Replacement?
Every professional roof replacement starts with a detailed roof inspection. This allows the contractor to evaluate the roof’s condition, identify damage, and prepare an accurate replacement plan.
Can I Stay Home During Roof Replacement?
In most cases, yes.
Many homeowners remain at home while the work is being completed. However, you should expect loud noises and vibrations throughout the day. Families with small children, pets, or anyone working from home may find it more comfortable to spend a few hours elsewhere while the roofing crew is working.
What Happens If Damaged Roof Decking Is Found?
If damaged roof decking is discovered during the tear-off, it should be replaced before the new roofing materials are installed.
Although this may add to the project, replacing damaged wood creates a stronger foundation for the new roof and helps prevent future problems.
Why Choose S&K Roofing & Construction?
A successful roof replacement isn’t just about following the right steps. It’s about having a team that takes pride in every detail.
At S&K Roofing & Construction, we understand that replacing a roof is a major investment. That’s why we focus on quality workmanship, honest communication, and roofing systems designed to handle Northeast Ohio’s weather.
Homeowners choose us because we provide:
- Free roof inspections
- Straightforward recommendations
- High-quality roofing materials
- Skilled local installers
- Careful attention to every stage of the project
- Complete site cleanup
- Reliable workmanship backed by experience
From the first inspection to the final walkthrough, we work hard to make the process simple, organized, and stress-free.
Your Roof Deserves More Than Just New Shingles
A long-lasting roof is built one step at a time.
Every stage, from the initial inspection to the final cleanup, plays a role in protecting your home for years to come. When each part of the roofing system is installed correctly, you’ll have greater confidence that your home is ready for Northeast Ohio’s changing seasons.
If you’re planning a new roof, don’t choose a contractor based on price alone. Look for experience, quality materials, and a team that takes the time to do the job right.
Ready for a Roof Replacement?
If you’re considering a new roof, let S&K Roofing & Construction guide you through every step of the process. We’ll inspect your current roof, explain your options in plain language, and install a roofing system that’s built to last.
Contact S&K Roofing & Construction today to schedule your free inspection and learn more about our professional roof replacement services in Northeast Ohio.