(440) 307-2060
What To Put Under Shingles: Complete Guide to Roofing Layers
When installing or replacing a roof, one of the most common questions homeowners ask is what to put under shingles. While shingles are the outermost layer that provides style and weather resistance, they’re not the only component that keeps your home safe. Beneath shingles, several layers work together to create a durable, watertight barrier that protects against rain, wind, snow, and heat. Understanding what goes under shingles is just as important as choosing the shingles themselves, because these layers determine how well your roof performs and how long it lasts.
This guide explores all the different materials and layers placed under shingles, why they’re necessary, and how they affect your roof’s durability, performance, and lifespan.
Why What Goes Under Shingles Matters
The roof system is not just shingles nailed to wood—it’s a carefully designed structure. Each layer beneath shingles plays a role in keeping the home protected. Without the right foundation, shingles may fail prematurely, leading to leaks, drafts, and costly repairs.
Some of the key reasons the underlayment and supporting materials matter include:
- Moisture Protection – Keeps rainwater and melted snow from seeping into the roof deck.
- Insulation and Energy Efficiency – Helps regulate attic and indoor temperatures.
- Longevity of the Roof – Extends the life of the shingles by providing a smooth, even base.
- Defense Against Ice Dams – Prevents water from backing up beneath shingles in colder climates.
- Fire and Wind Resistance – Some materials add safety and weather durability.
The Layers Under Shingles
When asking what to put under shingles, you’re really asking about the different layers that make up the roofing system. These layers include:
- Roof Decking (Sheathing)
- Roof Underlayment (Felt or Synthetic)
- Ice and Water Shield
- Roofing Membranes for Special Areas
- Ventilation and Insulation Support
Let’s explore each in detail.
Roof Decking (Sheathing)
The roof deck is the base layer under all roofing materials. It’s usually made of:
- Plywood – Strong, durable, widely used.
- Oriented Strand Board (OSB) – A cost-effective, engineered wood alternative.
- Plank Decking – Found in older homes.
Why It Matters:
The roof deck provides the structural surface where underlayment and shingles are attached. A weak or damaged deck can cause shingles to buckle or blow off, and leaks to form. Before new shingles are installed, roofers always check the decking for rot, water damage, or soft spots.
Roof Underlayment
The underlayment is the first protective barrier directly beneath shingles. It adds waterproofing and prevents shingles from sticking directly to the deck. There are several types:
1. Asphalt-Saturated Felt (Tar Paper)
- Traditional underlayment, available in 15-pound and 30-pound thicknesses.
- Provides moderate water resistance.
- Inexpensive but less durable than modern materials.
2. Synthetic Underlayment
- Made from engineered polymers.
- Lighter, stronger, and more resistant to tearing than felt.
- Offers better water protection and UV resistance.
- Now the most commonly used option in new roofing.
3. Rubberized Asphalt Underlayment
- Self-adhering and waterproof.
- Highly flexible, sealing around nails and fasteners.
- Often used in areas prone to heavy rain or snow.
Ice and Water Shield
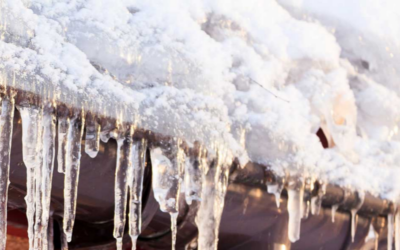
For colder climates, an ice and water shield is often applied under shingles along eaves, valleys, and roof edges.
- Provides a waterproof membrane that prevents leaks from ice dams.
- Self-sealing around nails to block water intrusion.
- Adds a critical layer of protection in snow-prone areas.
Even in warmer climates, this barrier is valuable in valleys where water collects.
Drip Edge
While not always thought of as “under shingles,” the drip edge is a thin strip of metal installed at roof edges, under the first row of shingles.
- Guides water away from fascia and into gutters.
- Prevents water infiltration at the roof edge.
- Protects against rot and wood damage.
Roofing Membranes for Special Areas
In addition to general underlayment, extra protection is used in vulnerable areas such as:
- Valleys – Where two roof slopes meet, directing water flow.
- Around Chimneys – Waterproof membranes or flashing are installed.
- Skylights and Vents – Require sealing to prevent leaks.
Ventilation and Insulation Layers
Technically not “under shingles” but essential to roof performance:
- Ventilation Systems (ridge vents, soffit vents, gable vents) keep airflow steady, preventing heat and moisture buildup.
- Insulation in the attic supports energy efficiency and protects shingles from damage due to heat from below.
Step-by-Step Look: What Goes Under Shingles During Installation
- Inspect Decking – Replace damaged boards.
- Install Drip Edge (Lower Eaves) – Helps direct water.
- Apply Ice and Water Shield – Especially in cold climates.
- Lay Underlayment Across Roof – Roll out synthetic or felt underlayment.
- Add Drip Edge (Rakes) – Protects roof edges.
- Install Flashing – Around chimneys, vents, valleys.
- Place Shingles – Secure outer layer.
Each step ensures the roof is watertight, stable, and able to handle decades of weather.
Common Mistakes with Under-Shingle Layers
- Skipping Underlayment – Leads to leaks and shorter roof life.
- Poor Deck Preparation – Shingles installed on rotten boards eventually fail.
- Improper Overlaps – Underlayment seams must overlap correctly to prevent water intrusion.
- Ignoring Climate Needs – Not using ice and water shield in snowy regions causes serious problems.
- Incorrect Fastening – Nails through underlayment must be sealed properly.
How Climate Affects What to Put Under Shingles
- Cold, Snowy Climates – Ice and water shield is essential.
- Hot, Sunny Climates – Synthetic underlayment resists heat and UV better than felt.
- Rainy Regions – Waterproof membranes and proper flashing are critical.
- Wind-Prone Areas – Extra-fastened underlayment prevents uplift.
Cost of Materials Under Shingles
Costs vary depending on material choice and roof size. On average:
- Felt Underlayment – $0.15–$0.30 per sq. ft.
- Synthetic Underlayment – $0.30–$0.75 per sq. ft.
- Ice and Water Shield – $0.75–$1.50 per sq. ft.
- Drip Edge – $1–$2 per linear ft.
Although these costs may seem small compared to shingles, they greatly influence long-term durability and performance.
Longevity of Different Materials Under Shingles
- Felt – 15–20 years, but often replaced earlier.
- Synthetic Underlayment – 25–50 years depending on quality.
- Ice and Water Shield – Matches the lifespan of shingles (20–40 years).
Investing in higher-quality materials under shingles can add decades to the roof’s lifespan.
Comparing Shingle Layers by Roof Type
- Asphalt Shingles – Usually paired with synthetic or felt underlayment.
- Metal Roofs Over Shingles – Often need a synthetic barrier to prevent moisture.
- Tile Roofs – Require strong underlayment due to long lifespan of tiles.
- Slate Roofs – Must use durable waterproof membranes.
How Underlayment Affects Energy Efficiency
Though often overlooked, underlayment plays a role in home efficiency. Synthetic options often include reflective properties, while proper ventilation combined with underlayment prevents attic heat buildup that shortens shingle life.
The Future of Under-Shingle Materials
Roofing technology continues to evolve, with improvements in:
- Breathable Underlayments – Allow moisture to escape while blocking water.
- Eco-Friendly Materials – Recycled synthetic fibers and biodegradable components.
- Integrated Smart Layers – Underlayment that can signal when water infiltration occurs.
Conclusion
When considering what to put under shingles, remember that the visible roof covering is only part of the system. Roof decking, underlayment, ice and water shield, drip edge, and ventilation all work together to create a strong, leak-resistant, and long-lasting structure. While shingles protect from above, it’s the hidden layers beneath that ensure your roof withstands decades of weather.
By choosing the right materials for your climate, home style, and budget, you not only extend the life of your roof but also increase energy efficiency and reduce future repair costs. Investing in quality layers under shingles ensures your home stays safe, dry, and comfortable for years to come.