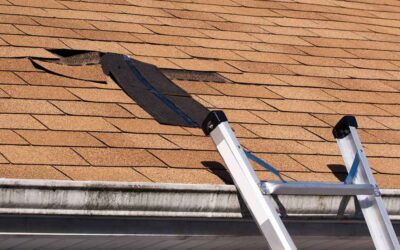
Installing roofing felt, also known as tar paper, is a critical step in creating a durable and weather-resistant roofing system. This underlayment acts as a protective barrier between the roof deck and the final roofing materials, such as shingles or tiles, safeguarding your home from moisture infiltration and extending the lifespan of your roof. Whether you’re a seasoned DIY enthusiast or a homeowner looking to understand the process, this comprehensive guide will walk you through the essentials of installing roofing felt.
Understanding Roofing Felt
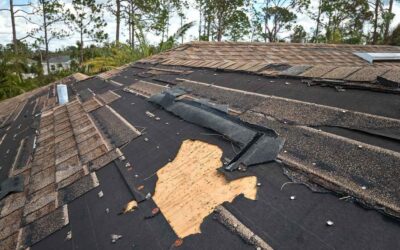
Roofing felt is typically made from a base material—either organic or fiberglass—that is saturated with asphalt to enhance its waterproofing properties. It comes in rolls, commonly 36 inches wide, and is available in different weights, with 15-pound and 30-pound felt being the most prevalent. The heavier the weight, the more durable and protective the felt. citeturn0search1
Benefits of Installing Roofing Felt
- Moisture Barrier: It prevents rainwater or snow from seeping into the roof deck, thereby protecting the structural integrity of your home.
- Secondary Protection: In case the outer roofing material is damaged or blown off, the roofing felt provides an additional layer of defense against the elements.
- Uniform Surface: It offers a smooth surface for installing shingles, ensuring they lay flat and adhere properly.
- Fire Resistance: Some roofing felts have fire-resistant properties, adding an extra layer of safety to your home.
Tools and Materials Needed
Before embarking on the installation, gather the following tools and materials:
- Roofing Felt Rolls: Choose the appropriate weight (15-pound or 30-pound) based on your roofing needs.
- Utility Knife: For cutting the felt to the required lengths.
- Hammer or Staple Gun: To secure the felt to the roof deck.
- Roofing Nails or Staples: Galvanized to prevent rusting.
- Measuring Tape: For accurate measurements.
- Chalk Line: To ensure straight lines during installation.
- Ladder: For safe access to the roof.
- Safety Gear: Including gloves, safety glasses, and non-slip footwear.
Step-by-Step Guide to Installing Roofing Felt
1. Preparation
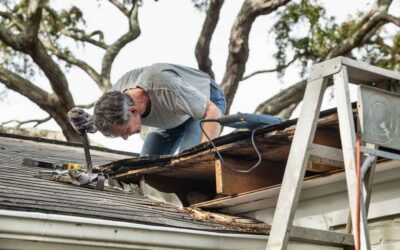
- Inspect the Roof Deck: Ensure the roof deck is clean, dry, and free from any protruding nails or debris. Repair any damaged or rotten sections to provide a solid foundation for the felt.
- Check Weather Conditions: Aim to install roofing felt on a clear, dry day to prevent moisture from getting trapped under the underlayment.
2. Install Drip Edge at the Eaves
- Purpose: A drip edge is metal flashing installed at the edges of the roof to direct water away from the fascia and into the gutters, preventing water damage.
- Installation: Starting at a corner of the eave, align the drip edge flush with the edge of the roof deck. Nail it in place using roofing nails spaced approximately 12 inches apart. Ensure the overlapping sections are seamless to facilitate proper water runoff.
3. Lay the First Course of Roofing Felt
- Starting Point: Begin at the lowest point of the roof, typically the eave. This positioning allows any water that penetrates the shingles to shed down the underlayment without seeping into the roof deck.
- Alignment: Unroll the felt parallel to the eave, ensuring it overhangs the edge by about 1/2 inch to 3/4 inch. This slight overhang directs water into the gutters.
- Securing the Felt: Using a hammer or staple gun, attach the felt to the roof deck. Place fasteners approximately every 12 inches along the edges and staggered across the middle to prevent wrinkling or shifting.
4. Overlap Subsequent Courses
- Overlap Measurement: Each new course should overlap the previous one by at least 2 inches. This overlap ensures that water flows over the layers without seeping underneath.
- Chalk Lines: Snap chalk lines to guide the placement of each course, maintaining straight and even rows.
- Upper Courses: As you move up the roof, continue this overlapping pattern until you reach the ridge.
5. Install Drip Edge at the Rakes
- Purpose: Installing a drip edge along the rake (the sloped edges of the roof) prevents wind-driven rain from entering under the roofing materials.
- Installation: Place the drip edge over the roofing felt along the rake edges. Nail it in place with roofing nails spaced about 12 inches apart, ensuring a tight fit.
6. Address Valleys and Roof Penetrations
- Valleys: In areas where two roof planes meet, creating a valley, lay an additional layer of roofing felt or a self-adhering waterproof membrane. Center it over the valley and ensure it extends at least 18 inches on each side for optimal protection.
- Roof Penetrations: For elements like vent pipes or chimneys, cut the roofing felt to fit snugly around these penetrations. Seal the edges with roofing cement to prevent water infiltration.
7. Finalize at the Ridge
- Overlapping: When both sides of the roof are covered with felt up to the ridge, overlap the felt from one side over the other. This overlap provides continuous protection across the roof peak.
- Securing: Fasten the felt securely along the ridge, ensuring it remains flat and wrinkle-free.
Common Mistakes to Avoid
- Inadequate Overlapping: Failing to overlap the felt sufficiently can lead to water seepage. Always maintain the recommended overlap measurements.
- Poor Fastening: Using too few fasteners